Assuming that you already have an Azure account and know how to log into the portal, creating a Subscription in Azure can be completed in just a few steps.
Step 1 - Navigate to the Subscription resource page
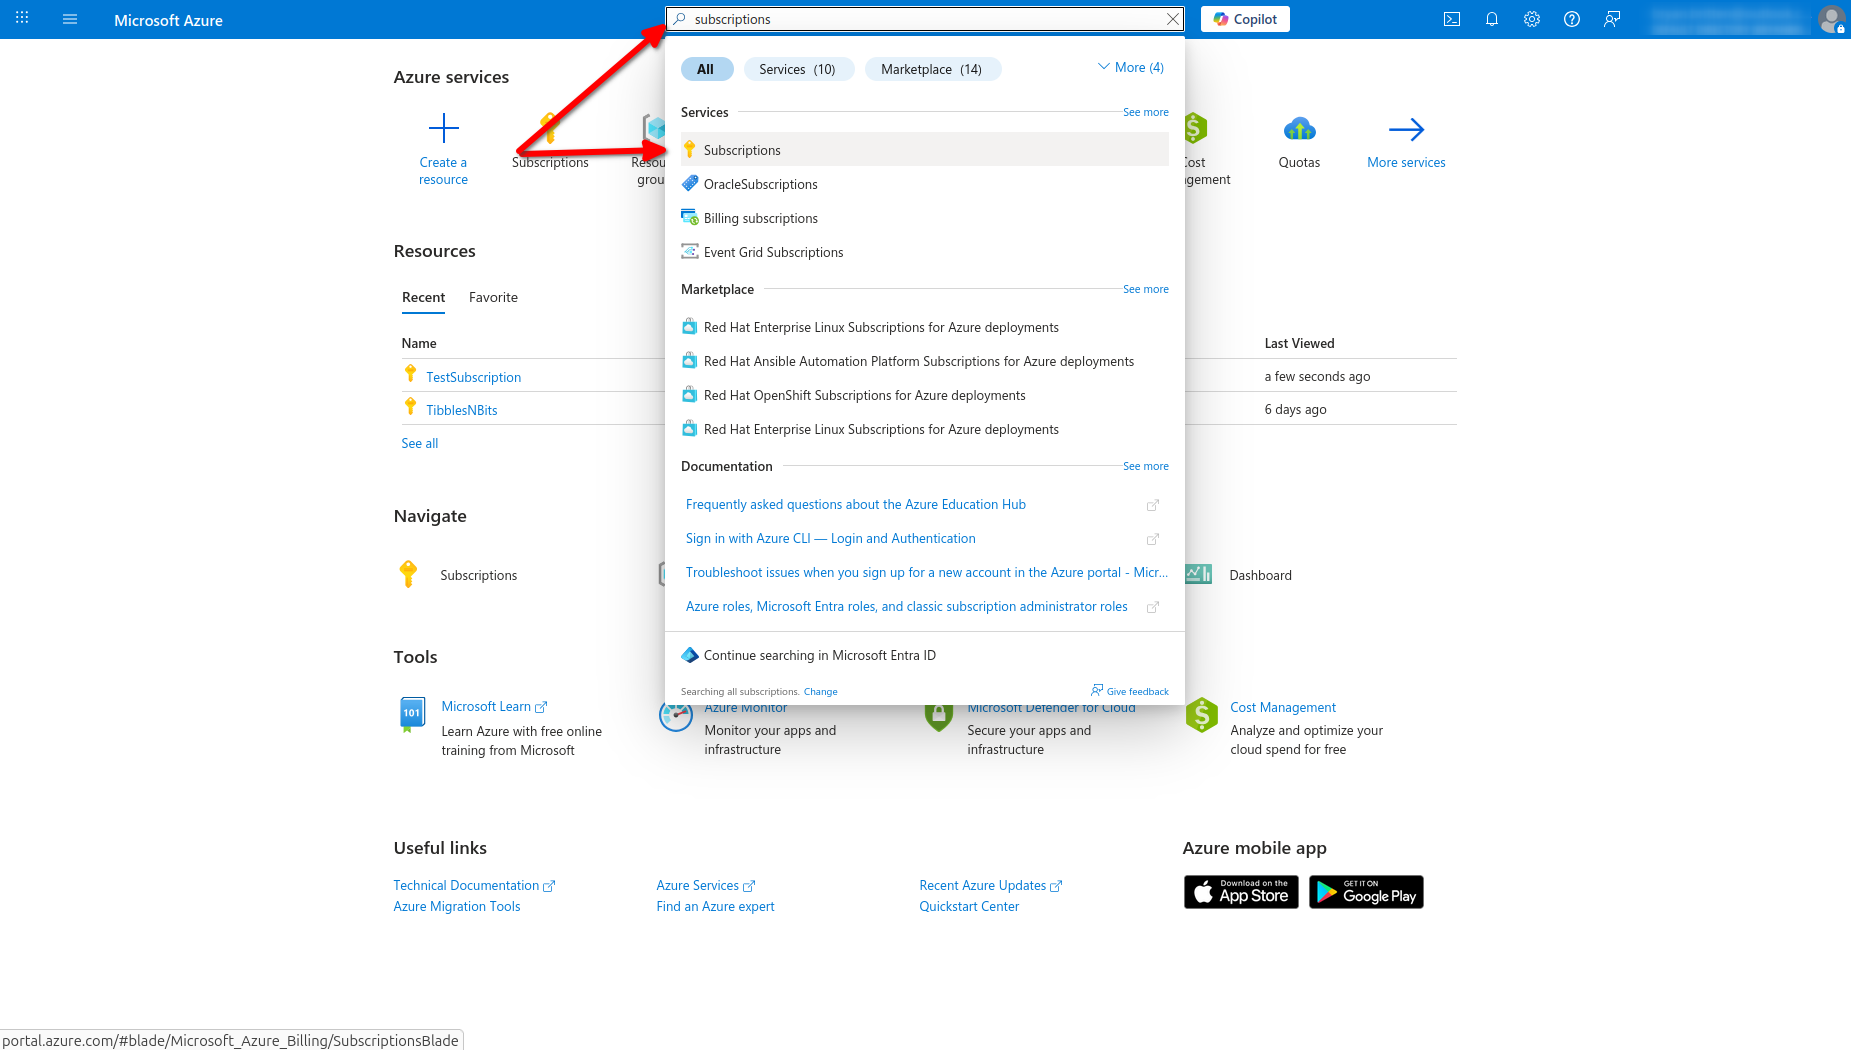
Search for the word “subscriptions” in the search bar at the top of the screen and select the option that has a golden key next to it. This will take you to the Subscription resource page.
Step 2 - Add a new Subscription
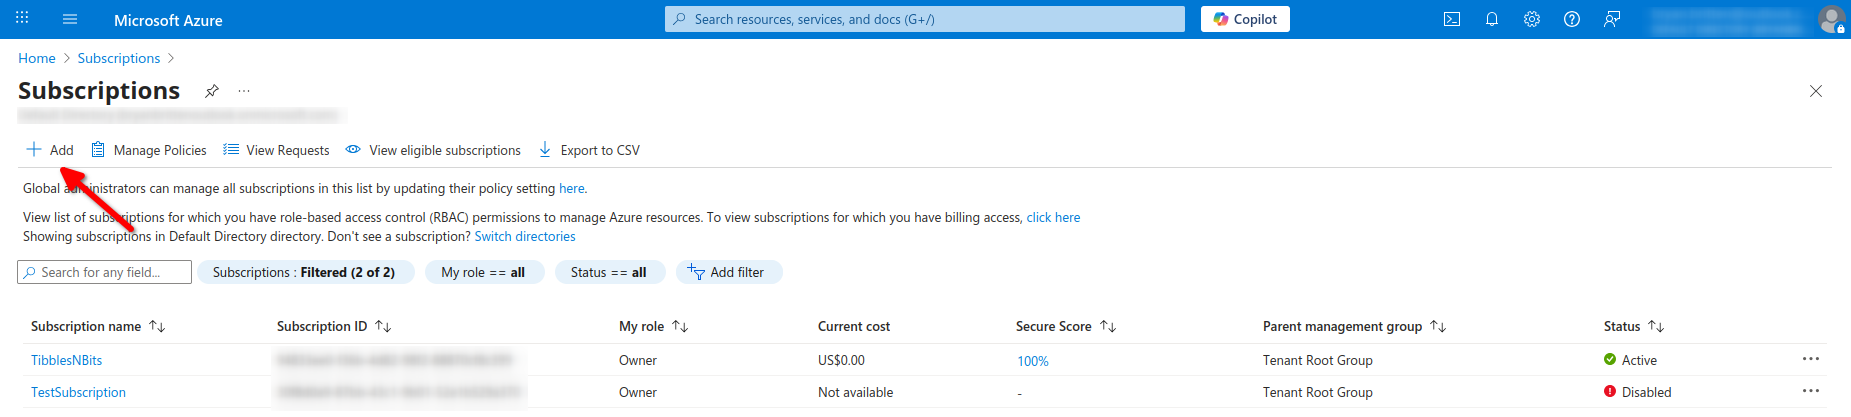
Once on the Subscription resource page, click the “Add” button towards the top-left of the screen.
Step 3 - Fill out the baseline information
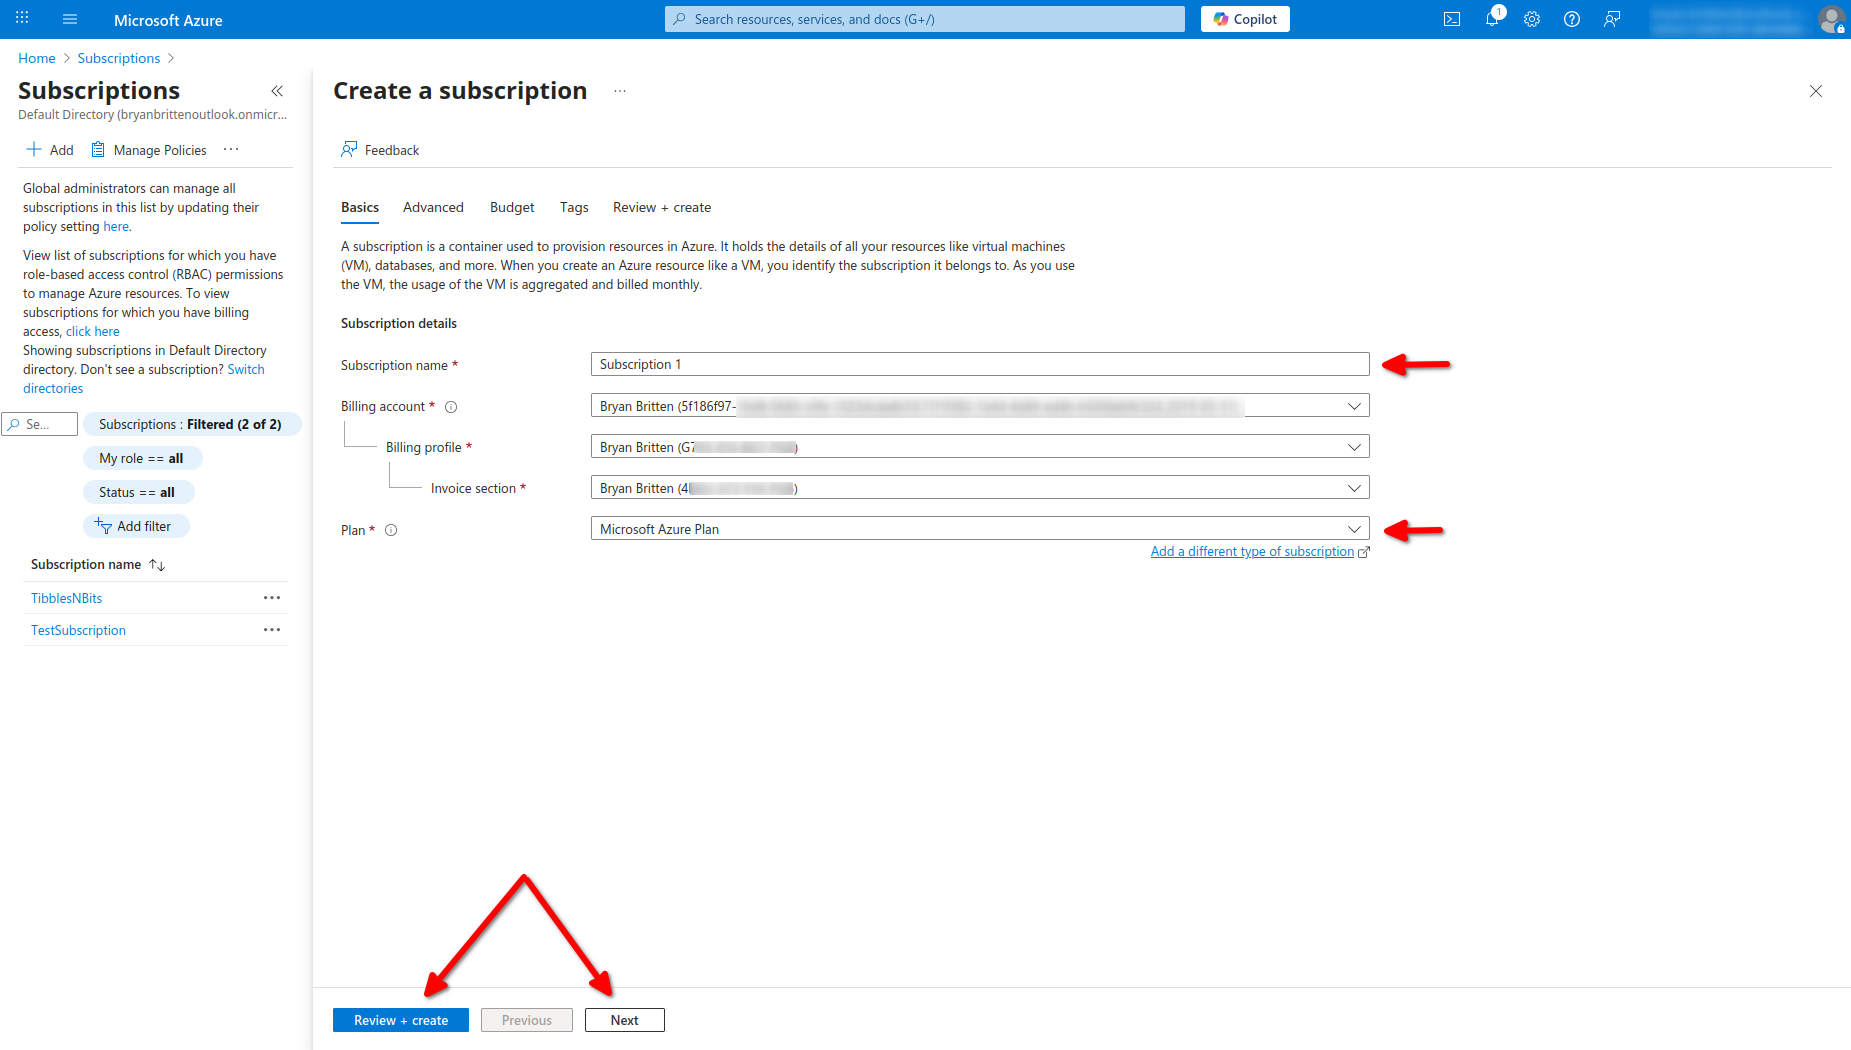
There are three key pieces of information that a subscription needs to have: a name, information on billing, and the type of plan. The name can be anything you want, the billing information should already be filled out, and the plan is up to you to choose.
NOTE: I won’t be going into detail about how to set up billing and invoices, but if the “Billing account”, “Billing profile”, and “Invoice section” fields do not auto-populate then you will likely need to create those. Search for “bill” in the search bar and you should see line items for “billing subscriptions” and “invoices”.
With regard to the plan, there’s a link under the dropdown that says “Add a different type of subscription”. If you click that, you’ll be navigated to a page with an array of different subscription options. If you have the “Trial” or “Student” option available, you’ll likely want to choose that. Otherwise, the “Pay as you go” option is what I use.
Once you’ve filled out the information, you can either click the “Review + create” button, which skips the rest of the steps, or you can click “Next” to go to the “Advanced” tab. You can also just click the tabs towards the top of the screen. The rest of the steps are optional, but I recommend going to the Budget tab and setting up a budget so that you don’t get surprised with an enormous bill.
Step 4 (Optional) - Create a Budget
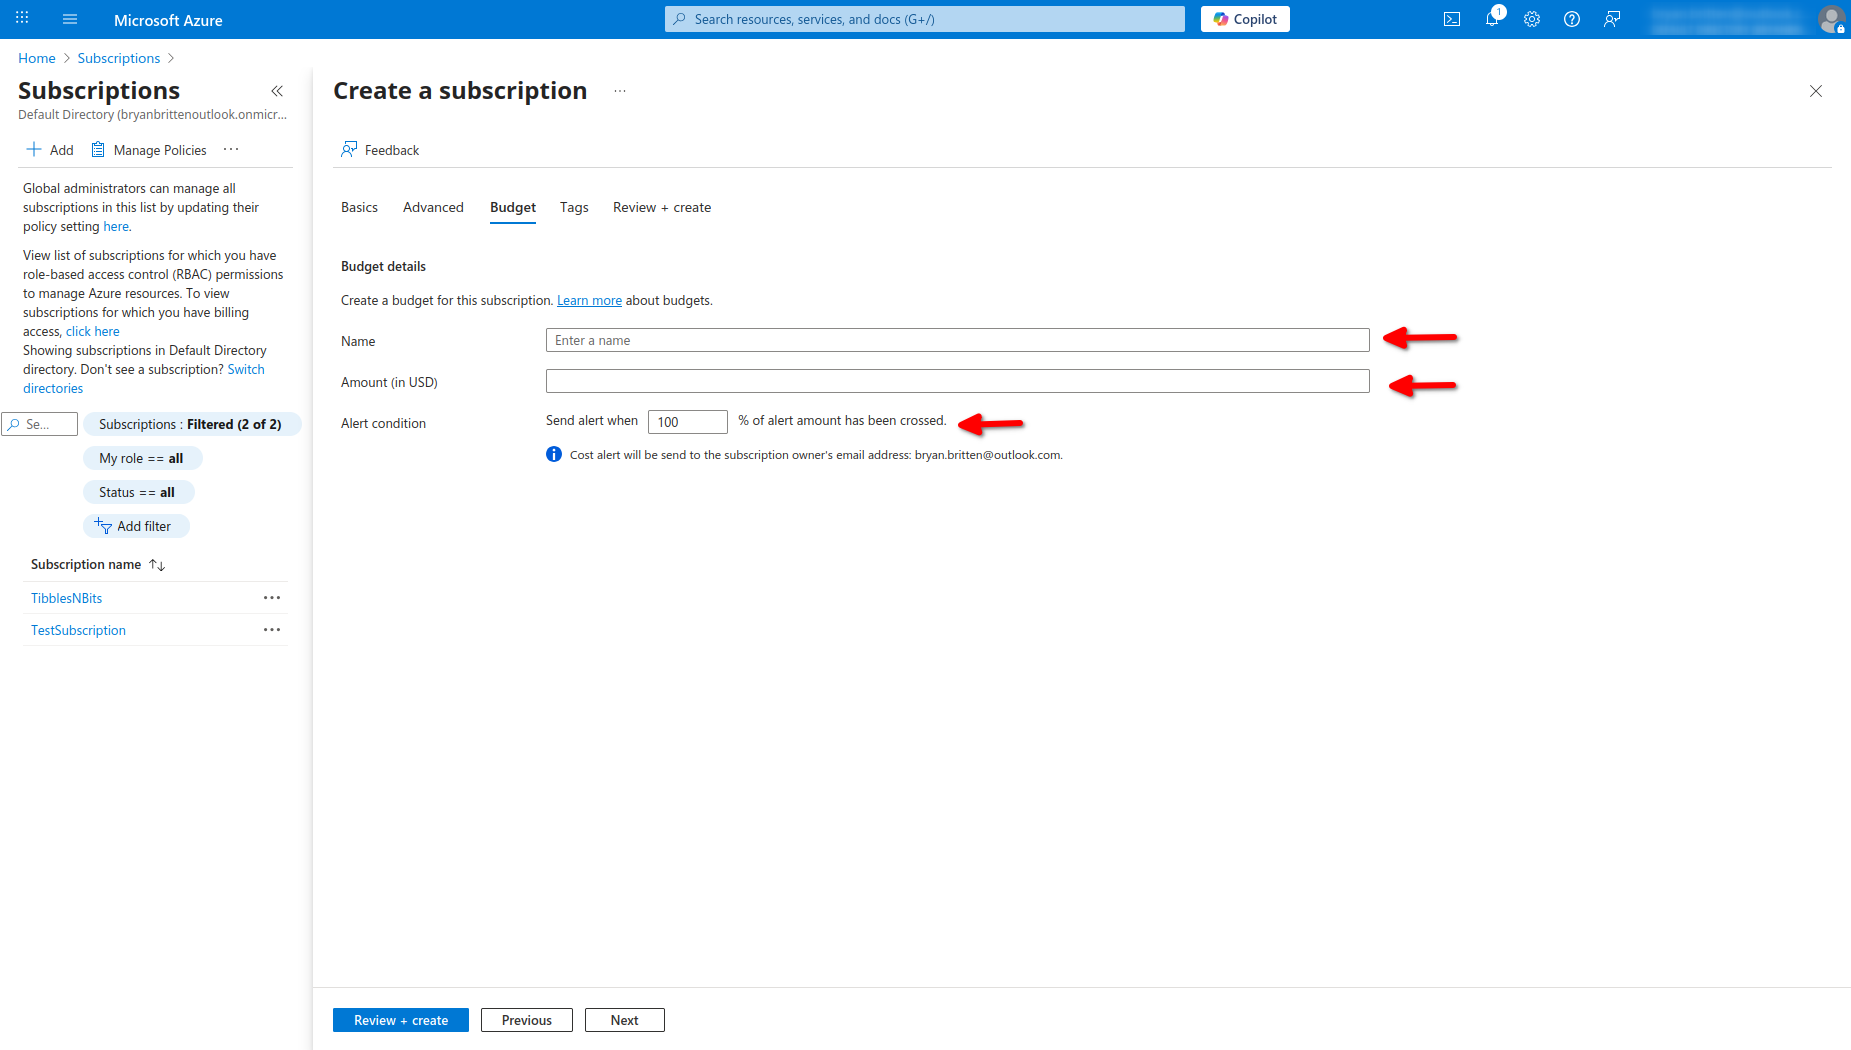
A Budget needs a name, an amount, and a percent of that amount to be used as a threshold for notifying you. I recommend naming the budget according to the following pattern: budget-[scope]-[purpose]-[env]-[region]. Feel free to let -[env]-[region] be optional. I also recommend setting the budget really low if you’re using Azure for side projects. I set my budget to $100 and my threshold to 50% so that I’m notified if my cloud computing costs hit $50.
Step 5 - Confirm settings
Once you’ve filled out the necessary information and are satisfied with everything, click the “Review + create” button. You should see a green banner at the top of the screen that indicates all validation checks have passed. Click the “Create” button and you should not have a Subscription.
Additional Reading
You can learn more about this topic by reading the Subscription docs and/or the Billing docs.